How to create PDFs from FM topics
Topic status automatically displays here - do not remove.
 Bookmark this topic
 Print this topic
This topic describes the procedure for creating a PDF from FrameMaker (FM) source topics. The two major variations described below are for different purposes: online or print. The online version contains bookmarks and a TOC, and is lightweight in file size. The print version does not contain bookmarks or TOC, and has visible printer cropmarks for paper alignment and trimming.
This topic details the use of FrameMaker V7, Acrobat V6, and Distiller V6. If you don't have these particular versions, you may find that the illustrations and forms, menu items and labels referred to in this topic may differ slightly from their position and names in your version. However, the principle and procedure is the same.
Online
Creating a lightweight and navigable PDF for online use is a single step process:
Creating a PDF for professional printing is a two step process:
- Print the FM to PostScript using the Adobe PDF printer driver
- Distill the PostScript file to PDF using Acrobat Distiller
To create a lightweight and navigable PDF for online use from FM source files:
- In FrameMaker, open the document you wish to convert to PDF.
-
From the menu, select File | Print.
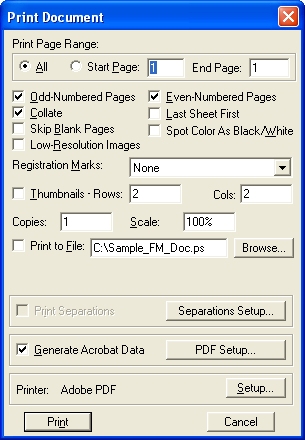
The 'Print Document' dialog will display:

It remembers the settings from its previous print action.
-
In the Printer section (at the bottom of the dialog), click Setup.
The Print Setup dialog will display:

-
In the 'Printer Name' field, select "Abobe PDF" and click the Properties button.
This will display the 'Adobe PDF Document Properties' dialog.
-
In the 'Adobe PDF Settings' tab:

- for the 'Adobe PDF Page Size' property, select "A4";
- in the 'Adobe PDF Conversion Settings' frame, for 'Default Settings', select "Smallest File Size";
- check the other fields in the frame;
- uncheck 'Do not send fonts to "Adobe PDF" '.
-
In the 'Paper/Quality' tab:

Check the 'Color' checkbox.
- Click OK.
-
Back at the Print Setup dialog:
- In the 'Paper Size' field, select "A4".
- Click OK.
This will close the 'Print Setup' dialog and return you to the FM 'Print Document' dialog.
If you changed the printer in the previous steps, a FM message notifying you of a printer change (font information) may display:

If so, click OK.
-
Back at the top the 'Print Document' dialog, check and select an appropriate
page range for inclusion in the PDF:
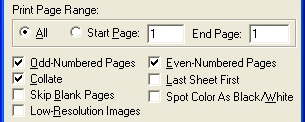
Generally, a PDF would consist of all pages in a document. Ensure that the checkboxes for 'Odd-Numbered Pages', 'Even-Numbered Pages', and 'Collate' are checked.
-
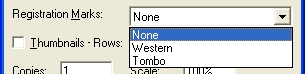
In the 'Registration Marks' field, if not already selected, select "None":
-
Check the 'Generate Acrobat Data' checkbox, and click the 'PDF Setup' button:

See How to configure the Acrobat Distiller PDF settings for online viewing.
 Tip
Tip
There is a return link to the next step from there.
-
Back at the FM 'Print Document' dialog, uncheck
the 'Print to File' checkbox:

Don't be concerned that a file name may be showing in the file name box. As long as the 'Print to File' checkbox remains unchecked, the filename is not used.
-
Click Print.
The 'Save PDF File As' dialog will display. Select a suitable location and file name for the PDF.
-
Click Save.
The Print progress dialog will display:

The Distiller 'Creating Adobe PDF' progress dialog will display:
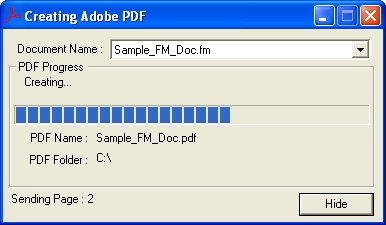
The PDF file will be created in the name and location you specified in the step above. This file is ready for viewing and distribution.

To print the FM to PostScript using the Adobe PDF printer driver:
- In FrameMaker, open the document you wish to convert to PDF.
-
From the menu, select File | Print.
The 'Print Document' dialog will display:
It remembers the settings from its previous print action.
 Note
Note
Interestingly, whilst writing this procedure, I observed that the 'Print to File' field first provided a file extension of ".prn", but upon return, altered it to postscript ".ps". In any case, Distiller will recognise and process either of these file types.
-
In the Printer section (at the bottom of the dialog), click Setup.
The Print Setup dialog will display:

In the 'Printer Name' field, select "Abobe PDF" and click the Properties button.
This will display the 'Adobe PDF Document Properties' dialog.
-
In the 'Adobe PDF Settings' tab:

- for the 'Adobe PDF Page Size' property, select "A3";
- in the 'Adobe PDF Conversion Settings' frame, for 'Default Settings', select "Press Quality";
- check the other fields in the frame;
- uncheck 'Do not send fonts to "Adobe PDF" '.
-
In the 'Paper/Quality' tab:

Check the 'Black & White' checkbox.
- Click OK.
-
Back at the Print Setup dialog, in the 'Paper Size' field, select "A3".
This allows for printer registration marks.
-
Click OK.
This will close the 'Print Setup' dialog and return you to the FM 'Print Document' dialog.
If you changed the printer in the previous steps, a FM message notifying you of a printer change (font information) may display:
If so, click OK.
-
Back at the top the 'Print Document' dialog, check and select an appropriate
page range.
Generally, a PDF would consist of all pages in a document. Ensure that the checkboxes for 'Odd-Numbered Pages', 'Even-Numbered Pages', and 'Collate' are checked.
-
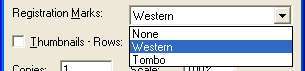
In the 'Registration Marks' field, select "Western".
-
There are two possibilities at this step:
-
Either save the PDF as a PostScript file (for later conversion to
PDF using Distiller), by checking the 'Print to File' checkbox, and
clicking Browse to select an appropriate file location.

-
Alternatively, utilise Acrobat Assistant which generates the PDF file
directly by unchecking the 'Print to File' checkbox.
-
Either save the PDF as a PostScript file (for later conversion to
PDF using Distiller), by checking the 'Print to File' checkbox, and
clicking Browse to select an appropriate file location.
-
If enabled, uncheck the 'Generate Acrobat Data' checkbox.
 Note
Note
The 'Generate Acrobat Data' field may be disabled (greyed-out) depending upon which printer driver is selected.
It becomes enabled—and checked by default—whenever the 'Adobe PDF' printer driver is selected. -
Click Print.
If you elected to save the PDF as a PostScript file, the postscript file will be created in the name and location you specified in step 11 above. The Print progress dialog will display:
This file is ready for distilling into PDF. See How to distill a PDF from a PostScript file.
This procedure is completed. You will be unable to perform the next step (14).
-
Alternatively, if you elected to utilise Acrobat Assistant and generate the
PDF file directly, the 'Save PDF File As' dialog will display. Select a suitable
location and file name for the PDF. Click Save.
If you chose a file name that already exists, you may be prompted for permission to overwrite it. If so, click Yes .
The Distiller 'Creating Adobe PDF' progress dialog will display:
The PDF file will be created in the name and location you specified in this step. This file is ready for professional printing.
To distill a PDF from a PostScript file:
-
In Acrobat Distiller, open the Postscript file you want to distill into a
PDF.
The Distiller will convert the PostScript file to PDF using its current settings. Locate the PDF file in the same folder and with the same name as the PostScript file.
To configure the Acrobat Distiller PDF settings for online viewing:
-
In the FrameMaker 'Print Document' dialog, click the 'PDF Setup' button.
This will display the 'PDF Setup' dialog.
-
In the 'Settings' tab:
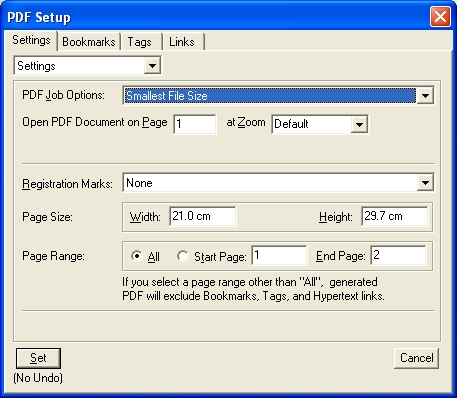
- for the 'PDF Job Options' property, select "Smallest File Size";
- check that the 'Registration Marks' selection is set to "None";
-
check that the 'Page Size' dimensions match the final page size you
expect",
for example, A4 is 21.0 x 29.7cm; - check that the 'Page Range' is set to "All".
-
In the 'Bookmarks' tab:

- check the 'Generate PDF Bookmarks' checkbox.
Note
Should you happen to see the ridiculous large number in the 'Bookmarks Expanded through level' property as illustrated, the PDF settings part of the PDF generation process may fail, and crash FM. See How to correct 'PDF Settings' for online generation.
Tip
There is a return link to the next step from there.
-
In the 'Tags' tab:
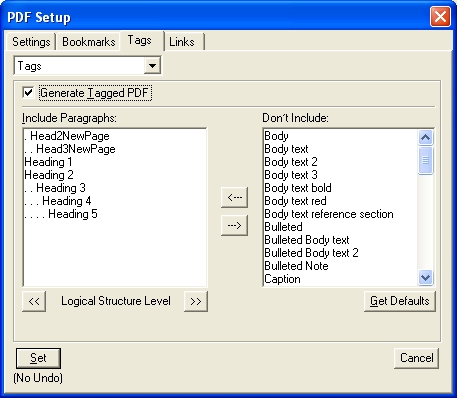
- check or uncheck the 'Generate Tagged PDF' checkboxI don't see that this makes any difference to the PDF functionality.
-
In the 'Links' tab:

- uncheck the 'Create Named Destinations for All Paragraphs' checkbox.
- Click Set.
Return to 'How to create a lightweight and navigable PDF for online use from FM source files'.
To correct the 'PDF settings' for online PDF generation:
When generating a PDF for online use, a PDF TOC is required. This is created using the 'PDF Settings' properties of the FM source files. To ensure proper TOC generation, each of the FM source files must have their 'PDF Settings' set appropriately. There are many ways to do this, but it seems that some cause corruption and crash FM in the PDF generation process.
The corruption is visible as a ridiculously large number in the 'Bookmarks Expanded through level' property as illustrated:
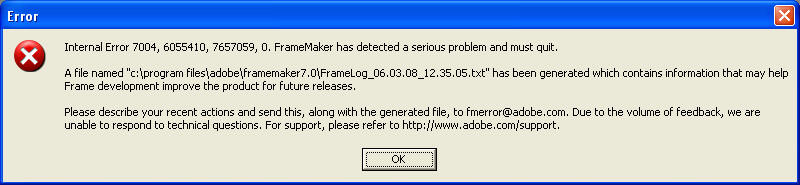
The FM crash produces a cryptic error message as illustrated:
One way to resolve the problem, appears to be to open each of the FM source files in FM, leave them open during the entire PDF generation process, and individually set their 'PDF Setting' properties for online PDFs before PDF generation.
It does not appear possible to set the 'PDF Settings' properties of their common book FM file, as this always displays the corrupted large number discussed above.
-
In FM, open each FM source file for the PDF and use the FM menu to select
Format | Document | PDF Setup.
This will display the 'PDF Setup' dialog for that particular document.
-
In the 'Bookmarks' tab:
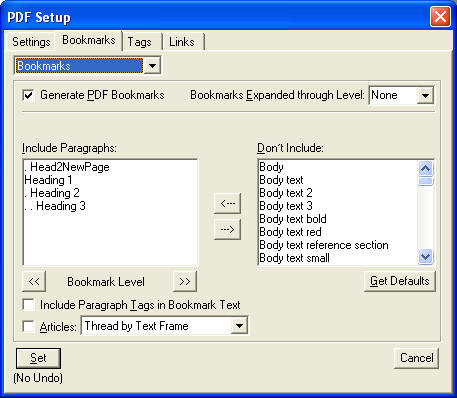
- select 'None' from the 'Bookmarks Expanded through level' property drop-down box.
- Click Set.
- Repeat this procedure for each and every FM source file in the FM book.
Return to 'How to correct the 'PDF Settings' for online PDF generation'.
According to http://www.microtype.com/FM_bugs.html:
-
Results of "Bookmarks Expanded through Level" settings may be inconsistent;
"268435453" may be displayed instead of All, None or Default.
Workarounds:
(1) Type a number in the Bookmark Expanded through Level box, indicating the bookmark level.
(2) Use the CollapseBookmarks function (TimeSavers/Bookmark Controller).
(3) If you need help collapsing bookmarks manually in Acrobat, use the free PlanetPDF Collapse Bookmarks Plug-in. -
Distilling may fail when creating PDFs or distilling PS files with Tagged
PDF information:
(%%[ Error: undefined; OffendingCommand: pdfmark; ErrorInfo: StRetrieve P127021 ]%%
Stack: /StRetrieve) ...
Workaround: turn off Generate Tagged PDF in PDF Setup
According to http://www.adobe.com/support/techdocs/318572.html:
Additional Information
In FrameMaker 7.0, the options in the Bookmarks Expanded Through Level pop-up menu (None, Default, and All) don't work correctly. These options are converted to high numeric values when you close the FrameMaker document.
In addition, if you reopen the PDF Setup dialog box in the same session, after typing zero, FrameMaker may crash and return an error. The Bookmarks Expanded Through Level setting is also unable [to] interpret if the dialog is left blank or where spaces precede a numeric value.
If you change settings in the book file, FrameMaker applies those changes to each open document in the book file; closed documents retain the old settings.
This issue is corrected in FrameMaker 7.0p578 http://www.adobe.com/support/downloads/detail.jsp?ftpID=2111
See Also
 Lotech Solutions' Tips, Tricks, and Procedures
|
Lotech Solutions' Tips, Tricks, and Procedures
|
 How to print PDFs four-to-a-sheet
 email webmaster
Copyright Lotech Solutions. All rights reserved.